
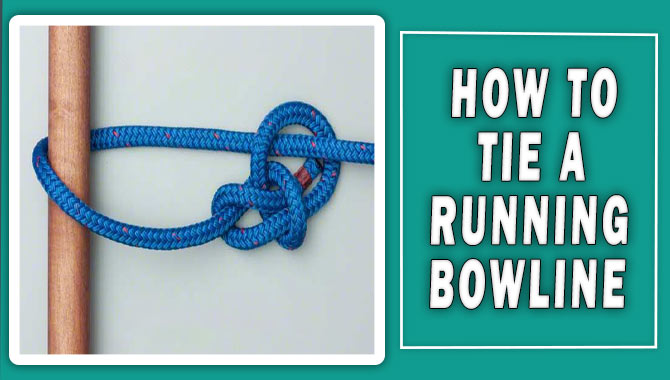
When the conversation turns to knot-tying, most of us tend to falter. We’re not sure of the knot, end up making a mess of it, or end up with a rope that could be stronger than we thought. If you’re new to knot tying or want to improve your skills, this guide is for you. Here, we’ll teach you how to tie the running bowline using a few easy steps.
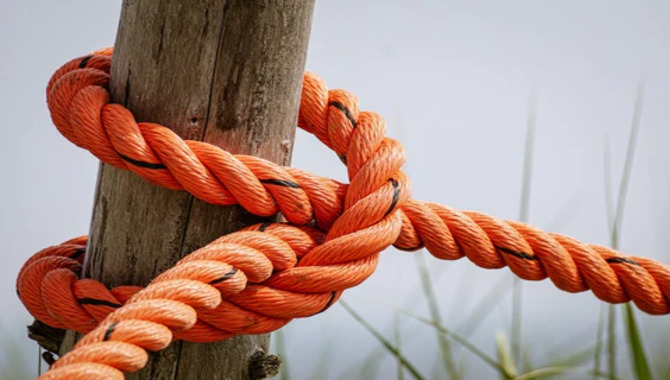
This knot is perfect for securing things such as boats, tents, lines, and anything else to which you might need a secure connection. With this simple knot in your toolkit, you’ll be able to tackle any situation confidently. But in the world of knot-tying, the running bowline is no slouch. It’s an advanced knot that requires some self-confidence and patience. But the payoff is immense. Read on to learn how to tie the running bowline knot correctly, so it’s perfect every time.
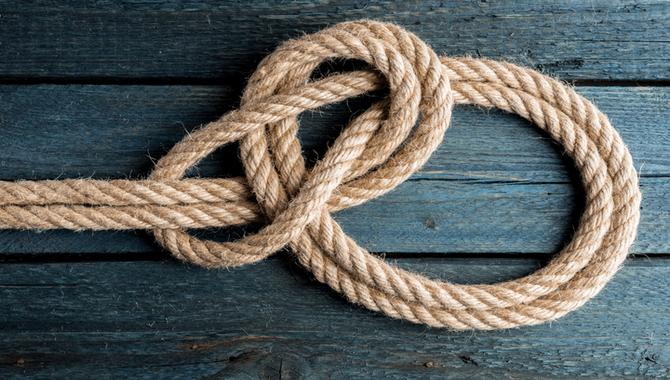
Bowline Knot
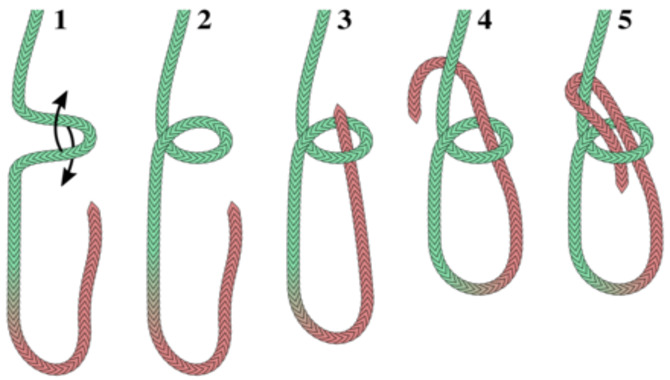
We use bowline knots to attach an object, such as a line or a cord, to another object. The basic steps are: tie the end of the line around the other object twice (Figure-8), then take the loop out in front and make a small “bunny ear” loop with your thumb and first two fingers (seen below). Put this new loop over the top of the original one, tuck it behind it so that it’s against your palm, then pull tight until you have four loops on each side (below).
Finally, cross these loops over each other once again, making sure to align them down through all four loops. You now have a bowline knot. The running bowline knot is useful for climbers because it is strong and easy to untie. To tie the running bowline, you must form a loop with the rope and place it over your left hand.
Simple Ways To Tie Running Bowline Easily.

There are a few ways to tie a bowline knot. One method is to make a loop with the running line and place it over the standing part. Cross the running line over the standing part. Take the free end of the running line and make a small loop with it, taking care to tuck it in behind if necessary. Take the larger loop and cross it over the smaller one, making sure to tuck it in behind if necessary.
Another method is to make a loop with the running line and put it around the standing part, taking care to tuck it in behind if necessary. Finally, you can also use a sturdy piece of cord or rope as your knotty material, tying a bowline knot around it as you would with a bight of rope. To efficiently tie a bowline knot, practice makes perfect.
1.Tying The Running Bowline
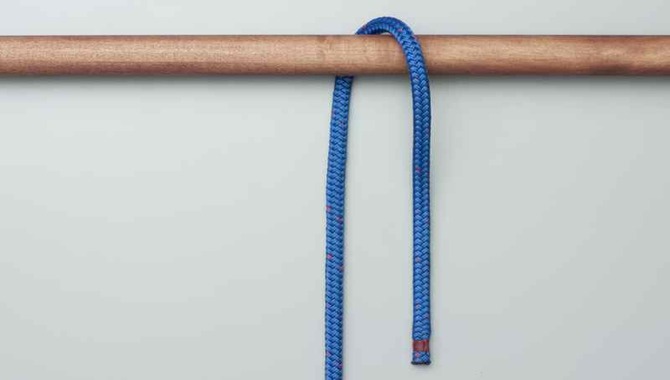
We use the running bowline knot to secure an object or line. It is a simple knot you can use in various situations. The steps involved in tying the running bowline are as follows: make a loop with the rope and place it over the object or line you want to secure; cross the ends of the rope over each other, forming a loop;
take the ends of the rope that are still crossing each other, and tuck them underneath the loop created in step 2; take the ends of the ropes that are still outside of the loop, and pull them tight to form a knot. This knot is easy to remember as it forms by taking the end of one rope and tucking it underneath another.
2.Tugging On It To Test Its Strength
A running bowline is a knot that you can use to secure a line while climbing or crossing a gap. To tie a running bowline, start by tying a basic bowline. Then, tie an overhand loop in the free end of the line. Pass the free end of the line through the overhand loop and pull tight to test the knot’s strength. If you need to adjust the knot, loosen it slightly and make the changes before re-tying it. This knot has several advantages over other knots, making it a reliable way to attach a rope or tether to an object.
3.Making A Turn
When tying a running bowline, it’s important to make a turn after you tie the first loop. This will ensure the knot is secure and will not come undone while you’re running. To make a turn, place your left hand over the end of the rope, then make a small loop with your right hand. Next, pull the loop tight, and tuck it underneath the main loop.
Finally, repeat steps 2 through 5 until you have completed all the loops. By making a turn after you tie the first loop of the running bowline, you can ensure that the knot stays secure during your run without any risk of coming undone. This knot is a great way to safely secure and attach your running bag or backpack to your body while running or exercising.
4.Adjusting The Size Of The Loop
A running bowline is a knot we use to secure an object or person in place. The basic steps of tying a running bowline are: forming the loop, tightening the loop, and adjusting the size of the loop. To adjust the size of the loop, you need to change the length of the string between your hands. Pay close attention to the steps outlined in this easy tutorial to tie a running bowline efficiently and safely. By following these steps and practicing with different lengths of rope, you can quickly develop skills in this knot and other knots.
5.Securing It With A Knot
A running bowline is an essential knot for securing ropes around objects. You can use it to secure a rope around an object to keep it from moving. The steps involved in tying a running bowline are: making a loop with the rope and tying it in a simple loop; taking the end of the rope that you just tied and making a small loop, or “bunny ear”; and making another loop with the rope and placing it over the “bunny ear” loop. Cross the ends of the ropes in front of each other, and tuck them behind the “bunny ear” loop. Now tighten up the knot by pulling on both ropes at once.
6.Tying The Standard Bowline
The running bowline is a knot that you can use to secure objects or tie together lines. The steps necessary to tie the running bowline are as follows. To tie the Standard Bowline, start by forming a loop with the line. Make sure the loop is tight, and there’s no excess line around it. Next, take the end of the main line and make a small loop with it. You should place this small loop just inside the first loop.
Take the other end of the main line and make a large loop with it. You should place the large loop just outside of the small loop you made earlier. Finally, draw up on both loops to form the bowline knot. The running bowline is a versatile knot you can use in many situations. It is easy to learn and can be used safely and efficiently by any sailor or outdoor adventurer.
What Are Some Common Mistakes When Tying The Running Bowline?

If you are new to bowline fishing, people make a few common mistakes when tying the running bowline. The first is to use slack more. Use enough slack when tying the running bowline to ensure it won’t tighten as you pull on it. A second mistake is not tying it tight enough. It would be best if you tied the running bowline tightly to ensure it doesn’t come loose while fishing. Finally, be careful to remember all steps in the bowline knot tutorial.
Pay attention to your tension and ensure the knot is tied correctly and securely. If you can’t relaunch the fish with the running bowline, make sure to re-tie it securely so it won’t loosen while fishing again. There are a few common mistakes that people make when tying the running bowline, and they can ruin your whole day if you need to learn how to avoid them. Here are the most common ones:
- Tying the running bowline incorrectly – This is often done by simply looping the rope around both anchor points instead of tying it directly between them. This causes the rope to become twisted and knotted, which makes it difficult to untie.
- Tying too tight of a knot – The running bowline should be tied with a moderately tight knot so that it’s still flexible enough to allow for movement but not so loose that it’ll come undone easily.
- Not securing the other end of the rope – If you’re hanging from a fixed point like a bridge or tree, make sure to tie the other end securely, so it doesn’t swing freely in the wind.
Conclusion
Running bowline is one of the most popular knots used by boaters to secure a rope around an object while running the bowline across the rope. It’s also a knot that we use in almost every knot-tying tutorial on our blog because of its simplicity, effectiveness, and ease of tying. By now, you must be wondering how this knot is different from the other varieties. Well, it is more intuitive and complex than the others.
But once you get used to it, it will become your go-to knot whenever you are camping or hiking. In addition to that, tying a running bowline is way more secure than the traditional versions because of its design. If you’re looking for an effective knot for securing your boat with a running bowline, read this blog again and try practicing the steps mentioned here. You’ll be tying the knot in no time at all.
Frequently Asked Questions:
1. How Do You Tie A Running Bowline?
Ans: To tie a running bowline, first, tie a simple bowline knot. Next, place a loop with the remaining line over the first loop. Cross the lines of the loops and pull tight to form a knot. Be sure to tension the knot well so it won’t loosen while fishing.
2. How Do You Re-Tie A Running Bowline?
Ans: Suppose the running bowline knot becomes loose while fishing, be sure to re-tie it securely so it won’t loosen again. Depending on the situation, you can use a simple overhand knot or an abseil knot.
3. What Are The Advantages Of Using A Running Bowline
Ans: The running bowline is very versatile, and many different knots can be used to tie it. Some good choices include the bowline knot, the sheet bend knot, and the clove hitch.
4. What Are The Advantages Of Using A Running Bowline?
Ans: Many people find the running bowline a versatile knot that can be used for various purposes. It can be used to tie things together, such as lashing objects to a boat or suspending something from a tree branch. Additionally, the running bowline is easy to tie and can be quickly adjusted to fit the situation’s needs.
5. What Is The Purpose Of A Running Bowline?
Ans: A running bowline is used to secure an object or line and is commonly used to attach a boat to a dock. To tie a running bowline, start by forming a loop with the rope. Make a half hitch (bypassing the left leg over the right leg), and then make another loop with the rope. Take the end of the rope and make a loop, but this time put it over the top of the first two loops. Put your hand inside the second loop and pull tight, then release the rope from your hand.
Leave a Reply