
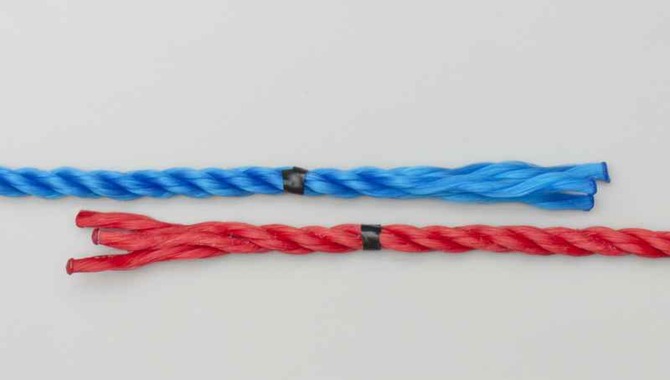
Ropes are essential for everyday life – from hanging a laundry basket to tying up a boat. They come in many different types and sizes and use for various purposes. There are two types of ropes: static and dynamic.
A static rope does not move, while a dynamic rope can move. Static ropes are mostly used for safety reasons – to secure people or objects and prevent them from moving or injuring anyone.
Dynamic ropes are more commonly used in the creative industries, where they’re often used to create movement effects or sounds. There’s nothing more satisfying than knotting a rope. It’s an activity that requires skill, knowledge, and hand-eye coordination. Start knotting ropes today to improve your skills and fine-tune your knot-tying artistry.
Whether you’re knotting a rope for the first time or tying knots for fun, knotting is an essential skill that every individual should have. You’re right if knotting ropes sounds intimidating or like a complicated process. That’s why we’ll create this guide to help you splice two ropes together in the easiest way possible. With this ultimate guide, you’ll be able to splice two ropes together and develop knot-tying skills that will help you master more knots in no time.
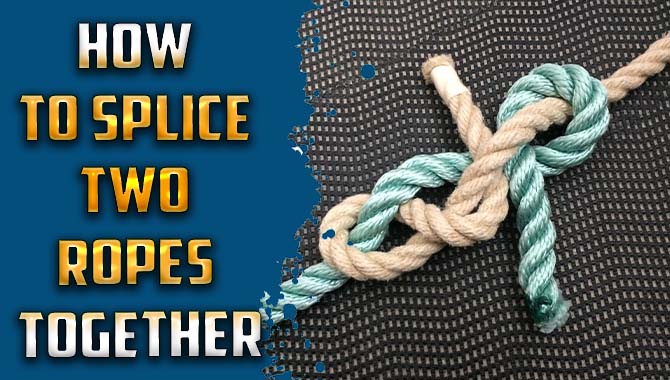
6 Simple Tips To Splice Two Ropes Together
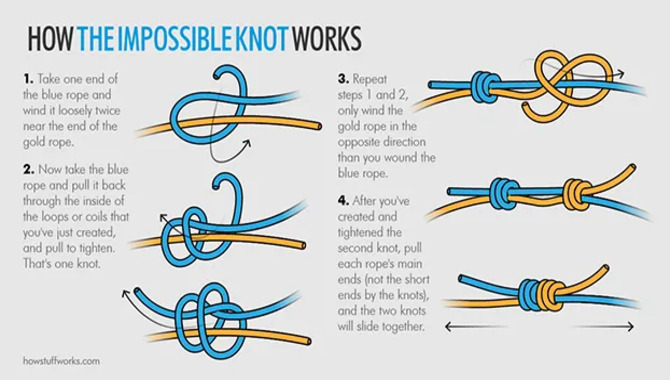
It is about how to splice two ropes together. This is your guide if you need to make a temporarily fixed connection between two ropes. Splitting two ropes together is an essential skill for anyone working with ropes – from climbers to sailors. We’ll teach you the basics of rope splicing, including how to make a simple loop, a clove hitch, and a bowline knot, whether you’re repairing a piece of equipment or need to make a temporary connection. Here are 6 simple tips to Splice two Ropes Together.
1.Choose The Right Ropes.
When splicing two ropes together, choosing the right type of rope for the job is important. For example, splicing ropes with synthetic fiber will significantly reduce the risk of damage. In addition, splicing ropes with a secure knot and easy to untie will ensure that the splice you can undo the quickly and easily if need be.
When splicing ropes, it’s essential to use a secure knot that is easy to untie. The best splicing knots can be untied without having to use any tools or equipment and are easy to learn and remember. It’s also beneficial to consider the ropes’ weight and size when selecting a splicing knot.
2.Pass One End Through The Other
Splicing two ropes together is a common task you can perform in various ways. One of the most basic methods, and the most commonly used, is passing one end of the rope through the other, ensuring that the Knot is secure. This way, you can splice the ropes together quickly and easily without requiring special skills or equipment. However, making a loop with the rope is often more effective before tying it tightly. This will allow you to fit two ropes into the same strand without splicing them.
The next step in splicing two ropes together involves making a loop out of one end of the rope and then tying it tightly. Once you have made this loop, you must cover its entire surface with a knot. To do this, wrap the rope’s end around your fingers several times until it forms a tight spiral. From there, twist the ends of the loop until they completely cover by the Knot. Finally, pull on both ends of the Knot to tighten it up and ensure it is secure.
3.Hold On To Both Ends Of The Rope.
When splicing two ropes together, holding on to both ends is important. This will help you maintain control and prevent the ropes from becoming entangled. However, using a commercially available splicing device designed for splicing two ropes together is also a good idea. These devices have handles made of comfortable material and feature specialized joints that can easily splice two ropes together.
Splicing two ropes together is a simple task in just a few minutes. However, it is important to use the proper techniques and equipment to splice the ropes safely. If you are splicing two ropes together, it’s always best to use gloves and eye protection to ensure your safety and the stability of the rope.
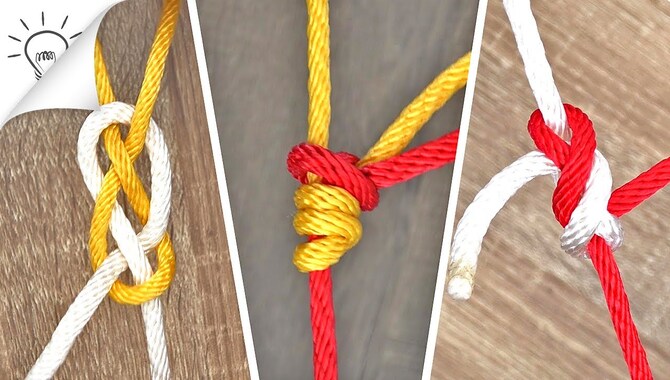
4.Tie A Knot In Each End
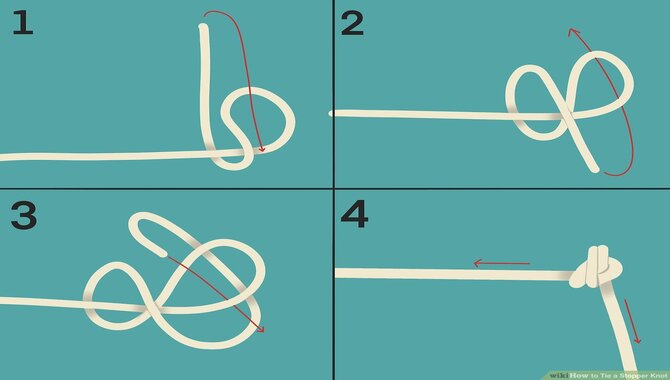
When splicing two ropes together, making a knot at each end is important. To splice two ropes successfully, you must use a knot that will not come undone while you are working. One common Knot used to splice rope is an overhand knot. This Knot works by creating a loop in one end of the rope and tucking the other into the loop.
The overhand Knot is easy to do and can finish quickly. However, it can be hard to untie when splicing two ropes together. Another good splicing knot is the figure-eight Knot. This Knot forms a loop in one rope’s end and then passes the other end through this loop. It self-ties when you finish splicing ropes.
5.Making A Temporary Knot
There are a few different ways to make a temporary knot. The simplest is to use a basic knotting technique known as the overhand loop knot. To do this, you take one rope in your left hand and tie it around the other several times, ensuring that the loops are facing outwards. You then pull the first loop tight and do the same with the second loop. You now have a temporary knot that will hold until you untie it.
Another common method is the fisherman’s Knot. This is similar to the overhand loop knot, but you tie it once very tightly instead of tying it around multiple times. This will create a more secure knot that is easier to untie than the overhand loop knot. Finally, there’s also the figure-8 Knot. This complicated Knot can be difficult to untie if it gets stuck in something; however, it generally considers more stable than other knots.
6.Then Splice The Rope Into Two Sections.
You need to cut each rope in half to splice two ropes together. Then, you need to tie one half of the rope around the other a few times, ensuring it’s tight. Finally, you need to splice the two ropes together by tying one of the loose ends of the first rope onto one of the tight ends of the second rope.
What You Need For The Splice
You will need a knotter, splicing block, hammer, nylon webbing, knife, scissors, or a lighter to splice two ropes together. The type of splice you make depends on the type of rope used. Nylon splice – This is the most common splice type. It uses a strand of webbing to splice two ropes together. You can cut the webbing with a knife to create the desired length for the splice.
This splicing type is easy and fast but may be weaker than others. A-tam splice – This type of splicing uses two strands of rope to create a joined end. When making this type of splice, two strands of rope are twisted around each other in different directions to create the joined end. The sha-tam splice is one of the strongest splices in climbing and mountaineering.
Hose splice – In this type of splice, a strand of webbing twists around both ropes before cutting it at the desired length for the splice. The result is a neat and clean joint with no fraying or gaps between the ropes. However, due to their strength limitations, hose splices can only make on round ropes.
Ionic splice – This is another form of hose splicing that uses an ionic chemical process to join two strands of rope together with no gaps. To make an ionic splice, you must first dissolve an electrolyte in water (like saltwater or sap) using a chemical Splicer (like sulfuric acid). Then you must apply this chemical solution to the rope ends using a wire brush.
What To Do After Making The Splice
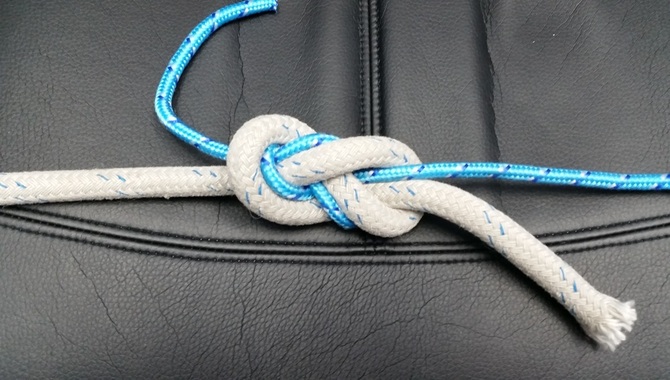
After splicing two ropes together, you should check the Knot itself to ensure it is secure. Ensure both ropes are of equal length and the splice isn’t too tight or loose. Ideally, the splice should be less than 3/4 of an inch thick. Once you’ve made a splice, make a small loop in one rope and insert it into the other. Take the larger loop out of the smaller loop and put it over the top of the smaller loop. Finally, pull both ropes tight to form your splice. This will result in a strong and durable connection between the two ropes.
What Are The Benefits Of Using A Splicer?
A few benefits of using a splicer include seamlessly joining two ropes of different thicknesses together. This can be important when you need to make a strong connection between two points or use ropes prone to wear down quickly. Another benefit of using a splicer is that it’s easy to use and requires minimal equipment. You insert one end of the rope into the other, then squeeze the handles together until the rope has been properly joined. This makes it easy to make quick and secure connections in difficult situations.
Conclusion
Ropes are essential to any outdoor activity, and you can use them for various purposes. They’re commonly used to secure objects or people or to create temporary bridges or ladders. Craftsmen and women have used ropes for centuries to create beautiful, functional items. Today, ropes are still used in various ways, but they’re also becoming more popular as a fashion accessory. Splice ropes are a great way to quickly and easily repair your clothes without having to go through the hassle of sewing them together.
They’re also a great way to fix small tears and holes in your clothes, making them look as good as new. Splicing two ropes together is a simple yet versatile knot. It’s something that every carabiner user should know. You learn this Knot and use it as soon as possible. We’ve discussed how to splice two ropes together. By following the tips, you mentioned above. Be able to splice two ropes together.
Frequently Asked Questions:
1.What Is The Most Effective Way To Join Two Ropes Together?
Ans: There are several ways to splice two ropes together, each with advantages and disadvantages. One common method is the clove hitch, a simple knot that you can use to join two ropes together.
2.How Do You Properly Splice Two Ropes Together?
Ans: You need to take a few steps to splice two ropes together properly. First, ensure that both ropes are of equal length and that the splice isn’t too tight or loose. Ideally, the splice should be less than 3/4 of an inch thick. Next, make a small loop in one rope and insert it into the other. Take the larger loop out of the smaller loop and put it over the top of the smaller loop.
3.What Are Some Potential Risks Associated With Improper Splicing Of Ropes?
Ans: Splicing ropes incorrectly can be incredibly dangerous. It can result in ropes tangled, leading to serious injuries. If you are skilled at rope splicing, it’s important to take the time to practice proper technique and ensure that you know exactly what you’re doing before using your skills in a potentially dangerous situation.
4.What Are The Benefits Of Using A Proper Splicing Technique?
Ans: Using a proper splicing technique can make it easy to make quick and secure connections in difficult situations. Proper splicing can also help protect the ropes from being damaged by moisture or other substances.
5.Is It Safe To Use This Tool On My Rope?
Ans: Yes, it is safe to use the splicing tool on your rope. It is designed for splicing ropes together and can be used to make a variety of knots.
Leave a Reply