
The HyperX cloud stinger mic is well-known. People with a basic understanding of electronics and microphones will be aware of this. However, the HyperX cloud stinger mic not working is a regular complaint.
The HyperX cloud stinger mic isn’t working, according to many users. However, like any other problem in the world, this one has a variety of remedies. You may simply solve the HyperX cloud stinger mic not working problem once you understand the answer. It would help if you correctly implemented the tricks in order to solve your challenge.
This issue can be addressed in a number of ways. If your HyperX cloud stinger mic isn’t working, try the following solution. The unusable Microphone is inconvenient because it can detract from your product efforts. A decent functional mic is required to produce high-quality audio and video.
If the audio is clear and easy to understand, viewers will be more captivated by the clip. On the other hand, no matter how good your video is, your audience will despise it. You’ll need a clear voice to make your video successful. The game includes every recording file that requires live audio.
Keep reading if you don’t want to lose your audience since we’ve come to give a solution to the mic problem. The HyperX cloud stinger mic will assist you in producing higher-quality content. Before we get started with the procedure, let’s have a look at the causes of the HyperX cloud stinger mic.
If you don’t know why something is happening, you won’t be able to repair it. So be aware of the source of the problem; this will help you resolve it swiftly and effectively. The HyperX cloud stinger mic, like any other operating system, is prone to a variety of issues.
Why Isn’t My HyperX Cloud Stinger Mic Working?
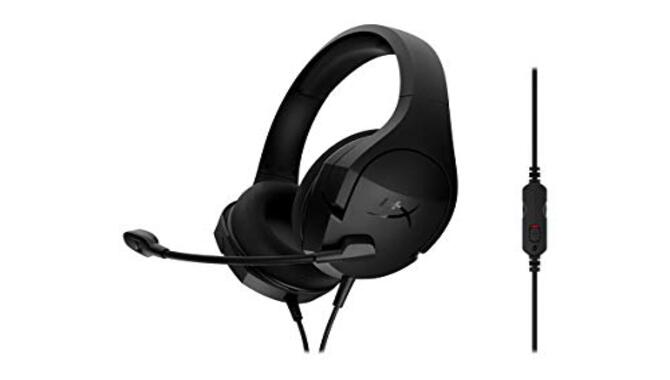
If you’re a die-hard gamer, you’re well aware of the significance of audio in gaming. The HyperX cloud stinger mic most helmet is meant to give users the finest audio experience possible so they can fully enjoy their game. Although it provides a fantastic experience, the headset’s Microphone can be finicky at times. You’ve come to the right place if your HyperX cloud stinger mic isn’t working. It’s possible that the mic isn’t working due to technical difficulties. The system you’re using the mic with may have a Default that prevents the mic from working.
There could be other reasons why the HyperX cloud stinger mic isn’t working. To tackle this particular problem as quickly as feasible, we must address the correct problem. Because it’s unreasonable and outside your control, you won’t be able to handle all of the mic issues. You can, however, make an attempt to maintain control over them. You may solve the problem of the HyperX cloud stinger mic not working using a few simple methods. This will aid in the growth of your video.
1. Double-Check Your Wires
Checking your connections is the first and most straightforward solution to your problem. Mic failure is frequently caused by a loose connection or a microphone that is not properly plugged in. To quickly resolve the issue, check and fix the loose or dangling Microphone connected to your device.
This is a pretty typical issue; we see it in many situations when consumers don’t know how to connect the mic properly. Later, they blame the corporation, oblivious to the fact that it is entirely their fault. While you’re shopping for a microphone, learn how to attach it correctly, which is a must. Otherwise, there’s a chance you’ll have a connection issue.
2. Turn On Audio Devices
Because your audio Devices are disabled, your HyperX cloud stinger mic may not work. You can enable them in your device’s audio settings. Simply go to your audio settings and turn on the Microphone and speakers. Make sure they’re not muted or turned down too low, as this could lead you to believe the mic or speaker isn’t working. If you don’t enable the audio devices, you’ll notice this problem right away. If your HyperX cloud stinger mic isn’t working, first check your audio equipment. So, turn on your audio device when you are using the mic.
3. Make HyperX Cloud Stinger Mic Your Default Microphone
It’s possible that your HyperX cloud stinger mic is turned off or isn’t set as the default device on your PC. It’s simple to re-enable it and make it your default device. To open the Run dialog box, first press Win+R, then type control and hit enter. After that, proceed to the control panel. In the control panel’s top right corner, select big icons from the view by drop-down option.
Finally, press the sound button—Right-click on any empty space inside the device after selecting the recording tab. The show disables Devices after that option. After you’ve completed all of these procedures, right-click headset Microphone and choose to enable. Right-click again and choose the Default devices option. That’s all there is to it; your job is done.
The Default device setting might seem difficult, but it is pretty easy if you follow the steps accordingly. So, it is better to learn to do the Default set properly if your HyperX cloud stinger mic is not working. It will help you solve the problem easily and fast, and as we have mentioned all the steps here, it will be easier for you.
4. Make Sure Your Headset Driver Is Up To Date
A crucial component is the headset driver. If you’re running the improper or outdated driver for your HyperX cloud stinger, the mic won’t work. So, to see if this is a problem for you, you need to upgrade the driver. To accomplish so, you’ll need to take a few steps. To begin, open the sound window by doing the first three actions outlined above. Those steps are Double-check your wires, Turn on audio devices and Make HyperX cloud stinger mic your default microphone.
The Playback tab is the go-to option—Right-click on your headphone in the playback tab and select properties. Then, in the controller Information section, click the Properties button. After that, select Change Settings from the drop-down menu. After that, go to the driver tab and select update driver. It is critical to keep the driver up to date. Then wait for Windows to look for new driver software on its own.
It would be preferable if you took action following this. The window will hunt for updates and perform them on its own. If your HyperX cloud stinger mic isn’t working, make sure your headset driver is up to date. It will assist you in quickly and easily solving the problem, and because we have included all of the processes here, it will be easier for you.
5. Reinstall Or Reset Windows
If the problem persists, corrupted files or configurations in your operating system are likely preventing your headphones mic from working properly. This problem can be resolved by resetting or reinstalling Windows. To avoid data loss:
- Remember to back up your computer first.
- After you’ve reinstalled Windows on your computer, try reinstalling your headset to see if it solves the problem.
- Try this solution right now if your mic is not working.
This step is very essential for making the mic work properly. Resetting windows works best in the problem solving of any particular problem. We all are used to do this as always choose to do reset our windows if suddenly any problem occurs. This reset techniques also works for this mic solving thing too. The process of doing this is not really difficult. Now it is much easier to do as we have mentioned all the instructions here. So, don’t wait to apply this method.
Why Isn’t My Microphone Functioning Yet My Headset Is?
Your computer’s headset mic may be deactivated or not configured as the default device. Or the microphone volume is so low that it can’t clearly record your voice. Enable the Headset Microphone by right-clicking it. Right-click it once more and choose Set as Default Device.
Conclusion
The HyperX cloud stinger mic has a good reputation. This will be obvious to anyone with a rudimentary understanding of electronics and microphones. The HyperX cloud stinger mic not working is, nevertheless, a common issue. Many users claim that the HyperX cloud stinger mic isn’t working. This problem, like any other in the world, has a range of solutions. Once you understand the solution, you can easily solve the HyperX cloud stinger mic not working issue. In order to solve your task, it would be beneficial if you accurately applied the tricks.
We are certain that you will be able to follow along with this simple method. We also hope that you can use this technique to fix the problem when the HyperX cloud stinger mic stops working, allowing you to record a high-definition video with sound while removing the distracting background noise. Please share this post about what to do if the HyperX cloud stinger mic stops working with your friends if you liked it. We are grateful for the opportunity to assist you with this issue. Please visit our website for more information on this subject. Please stick with us.
FAQ (Frequently Asked Questions):
1.How Can I Change The HyperX Cloud Stinger Mic’s Default Microphone?
Ans: Answer: It’s conceivable that your HyperX cloud stinger mic isn’t turned on or isn’t set as your PC’s default device. It’s easy to reactivate it and set it as your primary device. To bring up the Run dialogue box, use Win+R, then type control and press enter. Proceed to the control panel after that. Select huge icons from the view by drop-down option in the control panel’s top right corner. Finally, push the sound button—after selecting the recording tab, right-click on any vacant place inside the device. After that option, the show disables Devices.
When you’ve finished with all of these steps, right-click headset Microphone and select enable. Then, Right-click once more and select Default devices. That’s all there is to it; you’ve completed your task. The default device configuration may appear complicated at first, but it is really simple if you follow the steps carefully. If your HyperX cloud stinger mic isn’t working, it’s best to learn how to do the Default set properly. It will assist you in quickly and easily solving the problem, and because we have included all of the processes here, it will be easier for you.
2.How to Use The HyperX Cloud Stinger Mic’s Audio Devices?
Ans: Answer: Your HyperX cloud stinger mic may not operate if your audio devices are disabled. You can enable them in the audio settings of your device. Simply switch on the Microphone and speakers in your audio settings. Check to see if they’re muted or set down too low, as this may lead you to believe the mic or speaker isn’t working. You’ll notice this problem right away if you don’t activate the audio devices. Check your audio equipment first if your HyperX cloud stinger mic isn’t working. So, when you’re using the mic, make sure your audio device is turned on.
3.Why My HyperX Cloud Stinger Mic Isn’t Working?
Ans: Answer: If you’re a die-hard player, you already know how important audio is in gaming. The HyperX cloud stinger mic most helmet is designed to provide users with the best possible audio experience so they can focus on their game. The headset’s Microphone, while providing a terrific experience, can be troublesome at times. If your HyperX cloud stinger mic isn’t working, you’ve come to the right place. Due to technical difficulties, it’s possible that the mic isn’t working.
It’s possible that the system you’re using the mic with has a Default that prohibits it from operating. Other issues could be at blame for the HyperX cloud stinger mic’s failure. To get to the bottom of this problem as soon as possible. You won’t be able to address all of the mic troubles because it’s ridiculous and out of your control. You can, however, make an effort to keep them under your control. A few simple approaches can be used to fix the HyperX cloud stinger mic not working issue. This will help your video increase in popularity.
4.Why Isn’t My Microphone Functioning Yet My Headset Is?
Ans: Your computer’s headset mic may be deactivated or not configured as the default device. Or the microphone level is so low that it cannot clearly record your voice. Enable the Headset Microphone by right-clicking it. Right-click it once more and choose Set as Default Device.
5.How Can I Put My Headset Mic To The Test?
Ans: Click the Start button, then Accessories, Entertainment, and lastly Sound Recorder to launch it. To begin recording, press the record button. Talk into your headset’s microphone for roughly 10 seconds, then press the Stop button.
Leave a Reply