
Google Slides is a presentation software that lets you create and edit slideshows, presentations, and diagrams. It’s easy to use and can be integrated with Google Docs, Gmail, Sheets, and more.
When creating a presentation using Google Slides, you can choose from various templates or create your own. You can also add music and videos to your slides, which will help to make your presentation more engaging. You can even share your presentations online so that others can see them and get feedback. Text is one of the most important forms of communication on earth and will never stop being important.
Text will become even more important in the future because of all the technology we’re developing. Look no further if you are looking for ways to hide and reveal text in Slides.
We’ll cover all you need to know about hiding & reveal text in google slides. You’ll also get to know the different types of hiding options available.

How To Hide And Reveal Text In Google Slides With 5 Steps
Google Slides is a great tool for sharing presentations with others. But it can be tricky if you want to hide or reveal certain text pieces. We’ll walk you through a simple step-by-step guide on how to do just that. We’ll also provide a few tips on using Google Slides to its full potential, so you can create powerful presentations that are easy to understand and navigate.
Whether you’re a beginner or an experienced user, it will help you take your Google Slides projects to the next level. Here are How to hide and reveal text in Google Slides with 5 steps.
Create A New Document
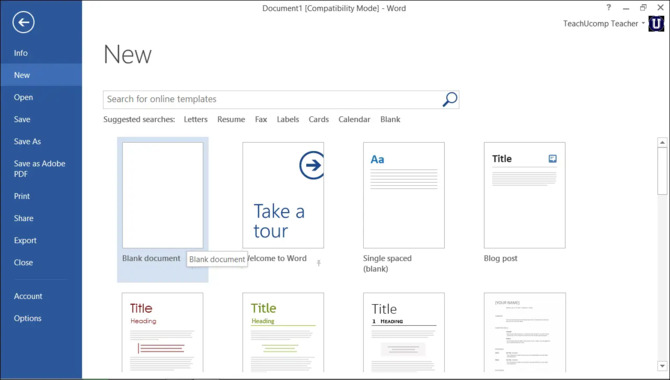
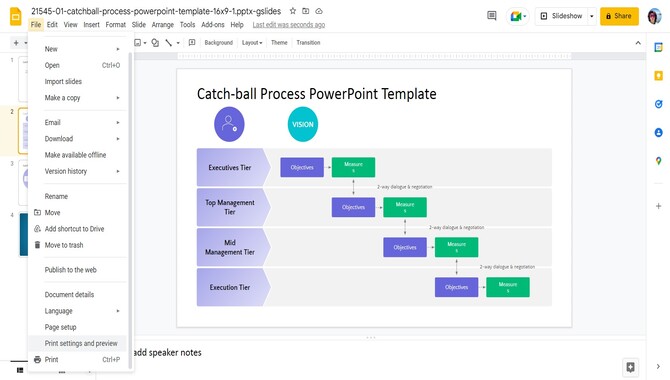
You’ll first need to create a new document to hide text in Google Slides. To do this, go to the Files tab on the Home screen, and select “New Document.” In the “Name” field, type in the name of your document (for example, “Hiding Text”). Next, click on “Create.
Once your new document has been created, you’ll want to enter the text you want to hide. To do this, select the text that you wish to hide and press Ctrl + H (or Cmd + H on a Mac). This will open up a dialog box where you can choose from several options. The first option is to simply click on OK to put the text back into view.
The second option is to embed it into another slide – this will make it so that you will include the hidden text in all future slides that are made from that particular slide. The third option is to delete the text entirely – this will remove it from both the original and subsequent slides made from it.
Select The Text You Want To Hide
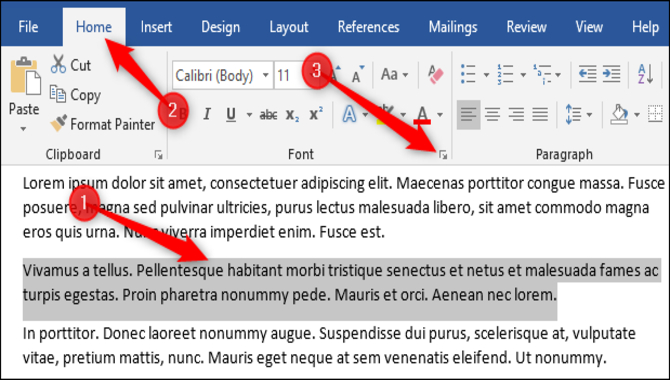
You can hide text in a Google Slide by first selecting the text you want to hide. Once you’ve selected the text, click the Hide button (the eye icon with a slash inside it). To reveal the hidden text, simply click the Show button (the eye icon without a slash inside it). You can also use keyboard shortcuts to hide and show text quickly in Google Slides.
Click The Hides Text Button.
To hide text in a slide, click the Hides Text button and select the text you want to hide. To reveal the text, click the Reveals Text button and select the text you want to show.
This allows users to read and share presentations easily and effectively. Besides, it also saves precious screen space and improves the readability of your presentation. It is always better to keep your audience engaged by hiding some text and revealing it at appropriate points in your presentation.
Select The Type Of Hiding You Want To Use
Text hiding hides the text within the slide by replacing it with a neutral background. Image hiding hides the image within the slide by replacing it with a neutral background.
Link hiding hides the link within the slide by replacing it with a neutral background. These are some of the different types of hiding you can use to help structure your presentation and make it more engaging.
Click OK

With Google Slides, it’s easy to hide and reveal text quickly and easily. The Hide and Reveal Text feature allows you to hide a text in a slide until you need it, or show it all at once. It is useful for hiding text that does not add value or distract from your story. The steps to hide and reveal text in Google Slides are
- Click on the text you want to hide or reveal.
- Click on the Hide Text button (the three lines with a down arrow).
- The text will now be hidden and will only appear in the slides once you click on the Reveal Text button.
- Click the Reveal Text button to show the hidden text again. With Google Slides, it is easy to hide and reveal text quickly and easily, making it easier for you to present your ideas effectively.
How To Change The Font Size Of The Text In Google Slides
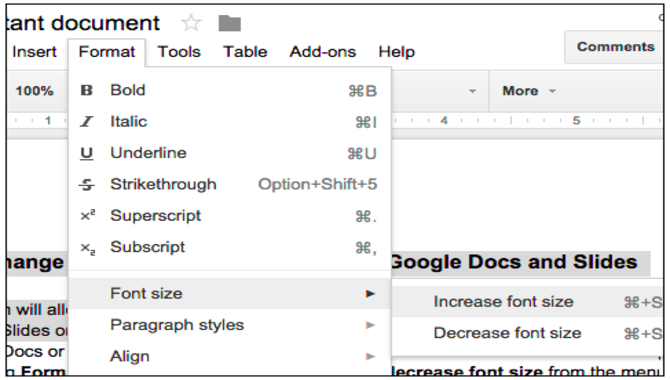
Several different font sizes are available in Google Slides, such as medium, large, and small. Choose a size that best suits your preferences and statement.
You can also use a custom font name in your slides by entering the “Font Name” box. This way, you can easily find and select the font you want among various options.
As mentioned previously, you can also adjust the text alignment and letter spacing to make your text more legible and readable. You can also change the color of your text by clicking on “Colors” in the “Text” tab. This will show you all the available colors for your chosen Font family. After making any changes to your text, click “OK” to apply them.
- Open Google Slides and click on the text you want to change.
- In the “Text” tab, click on the “Font” icon.
- Select the font size you want from the drop-down menu.
- Click on the “OK” button to apply the changes.
How To Change The Color Of The Text In Google Slides
If you want to change the color of the text in Google Slides, it’s easy. Go to the “View” tab and select “Text Appearance.” In the “Text Appearance” window, select the color you want to use for the text in your slides. You can also change the font, size, and style of your text in this window.
To change the color of a specific slide, select that slide and then click on the “Text” button (in the lower-left corner of the slide). You can also change the color of the text in a document as a whole by selecting “Text” from the “View” menu and then selecting “Edit Text Appearance.” Once you’ve made your changes, hit Save & Publish to save your changes and share them with others.
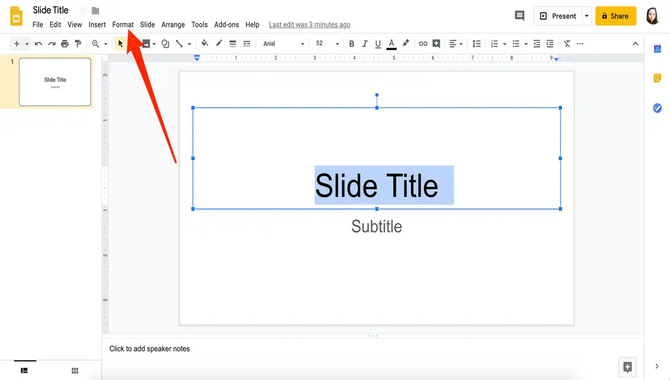
How To Add A Picture To A Slide With Text
Adding a picture to a slide with text is a great way to enhance your presentation. You can use it to illustrate your points, add context or interest, or simply make the presentation more visually appealing. To add a picture to a slide with text, first, open the slide in Google Slides.
Next, click on the Text tab at the top of the screen. Then, find and select the piece of text you want to include in your picture. You can then select which part of your picture you want to use – the background or the text itself. Finally, click on the Insert Picture button below your selected text and choose from your available photos.
Conclusion
You can use hide-and-reveal text if you want to add some spice to your presentations. This text appears and disappears according to a predefined schedule, which makes for an interesting and interactive presentation.
To add Hide and reveal text to your slides, first, make sure that you have the Google Slides Add-on installed. Once installed, open up a new slide and click on the Tools button (you’ll see it in the top right corner of your screen). From here, select the Text tab. Google Slides allows you to add text, images, and other objects to your slides to help tell your story.
To make your presentation more engaging, you can use text and images to highlight key points or enhance your slideshow’s flow. However, as with all things digital, there is always a need for improvement. We’ve discussed how to hide & reveal text in google slides.
If you’ve been looking for ways to change the appearance of text on Google Slides, has just the answer. We hope it helps. You can also see how to change font style and size in Google Slides.
Frequently Asked Questions
1.How Do You Stay Hidden In Plain Sight?
Ans: Here are 5 easy steps on how to hide text in Google Slides:
- Select the text you want to hide.
- On the View menu, select Hide.
- Click the checkbox next to the text you want to hide.
- Click Save.
- you will now hide the text from view.
2.How Do I Hide From My Family?
To hide text in a Google Slides presentation, drag the text to the bottom of the screen and select “Hide.” To reveal the text, select “Show” from the menu in the top left corner of the screen.
3.Why Do People Hide Things?
Ans: There are many reasons why people may hide things. Some people may hide things to protect their privacy or intellectual property or to avoid embarrassment.
4.How Do I Create An Animated Slide With Hidden Text?
Ans: To create an animated slide with hidden text, follow these 3 simple steps:
- Create a new slide with text that you want to hide.
- In the Properties panel, under the Text tab, change the Text Wrap property to “Hide.”
- Select the text you want to appear when the text is hidden, and click the “Reveal” button.
5.Is There A Difference Between CSS Animation And Javascript Animation?
Ans: Yes, there is a difference between CSS animation and JavaScript animation. CSS animations are performed by adding a class to an element and then adding an animation property to that class. JavaScript animations are performed by adding a snippet of code to an element and then calling the animate() function.
Leave a Reply